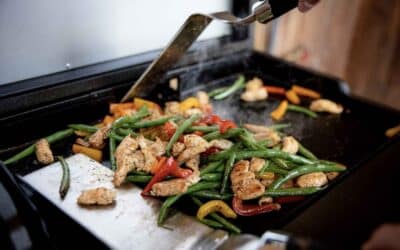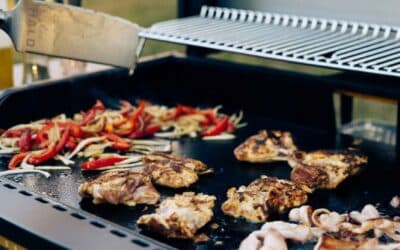


Charcoal grilling is a rite of passage for grill masters, and the smoky, flame-kissed results are simply unbeatable. But before you toss on those burgers, mastering the art of setting up a charcoal grill is key. Unlike its gas-powered counterpart, charcoal requires a bit more finesse. This guide will walk you through how to set up your charcoal grill for perfect grilling.
Use the right amount of charcoal.
You might think more charcoal equals more heat, and you’d be right – to a point. But what if you crave perfectly smoked ribs that need low and slow cooking for hours? It’s more about how you arrange the charcoal than the quantity.
A good rule of thumb is to consider the size of your grill and the desired cooking temperature. For high-heat searing, you’ll need a full chimney of charcoal (around 100 briquettes). For medium heat cooking, like burgers or chicken, half a chimney (roughly 50 briquettes) should suffice. And for those low and slow endeavors, you can use less charcoal arranged strategically.
| High Heat Direct Grilling | Medium Heat All Purpose Grilling | Low & Slow Smoking & Roasting |
| Large pile of charcoal | Medium to small pile | Small pile, around the edge or to each side of the grill |
What type of charcoal should you use?
- Lump Charcoal – Pure wood burned without oxygen, resulting in large, irregular pieces. Burns hot and fast with a strong smoky flavour, ideal for searing steaks.
- Charcoal Briquettes – Compressed mixture of charcoal and additives for uniform size and longer burning time. Good for medium heat grilling and offers more consistent heat than lump charcoal.
How long do you let the charcoal burn before cooking?
Let the charcoal become fully ashed over before cooking. This typically takes 15-20 minutes.
Choose the heat you want.
Different foods require different levels of heat.
Direct, High Heat
For high-heat searing of juicy steaks, burgers, or kebabs, create a concentrated heat zone in your grill.
- Fill a chimney starter with about 100 briquettes and light them up. Wait until the coals are ashy grey before using them.
- Open those bottom vents wide open – oxygen is the lifeblood of a hot fire!
- Once the coals are ready, dump them in a concentrated pile in the center of the grill. This creates a hot zone for maximum searing potential.
- Leave a small ember-free area on the edge of the grill for a “safety zone” in case of flare-ups. You can move your food there if things get a little too fiery.
- Pop your cooking grates back on and position them closer to the coals. The closer they are, the hotter they’ll get, giving you those coveted grill marks.
- Now that your searing station is primed, throw on your favorite high-heat foods and get ready to grill like a pro!
Medium, Indirect Heat
Perfect for thicker cuts or feeding a smaller crew, here’s how to set up for medium heat grilling:
- Clear the grates and open the bottom vents halfway (for lower temps) or fully open (for higher heat within the zone). Pile unlit charcoal on one side of the grill, aiming for a medium size.
- Use a chimney starter to light an additional half chimney’s worth of briquettes (around 50).
- Once lit, pour the hot coals onto the unlit pile, ensuring everything gets raked to that one side. This creates your medium heat zone.
- Replace the grates – position them closer to the coals for searing, or further away for indirect heat like roasting.
- Close the lid and let the grill preheat. Now you can sear your meats and then move them to the cooler side to finish cooking to perfection.
Low & Slow
This technique is the holy grail for low and slow BBQ – smoky, tender, and bursting with flavour. It’s perfect for long cooks like brisket, ribs, and pulled pork.
- Lay down a single chimney’s worth of unlit charcoal in a thin layer around the outer edge of the charcoal basket. Weave a few chunks of wood chips throughout the first ⅔ length of the snake.
- Open the bottom vent just a quarter of the way open. You can adjust up to half open depending on the weather conditions.
- Ignite about a quarter chimney’s worth of coals.
- Once the coals are ashy grey, pour them onto the very beginning of the charcoal snake. You can add a water-filled drip pan for heat control and extra smoke.
- Place the cooking grates on the higher setting in the grill.
- Close the lid and let the grill preheat to your desired low and slow temperature range, between 225°F to 275°F (107°C to 135°C).
- Nestle your food over the drip pan or in areas where there’s no direct heat from the coals. Now, sit back, relax, and let the low and slow magic happen!
Are You Ready for Perfect Charcoal Grilling?
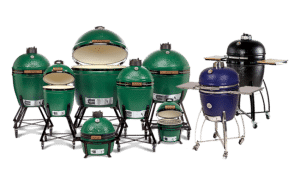
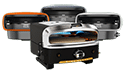
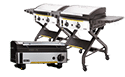
Now you’ve got the steps down for perfect charcoal grilling, from searing steaks to slow-smoking ribs, are you ready to grill? Team Harding is your one-stop shop for everything you need to master the art of charcoal grilling. We carry a range of charcoal grills, all the tools you need, and a wide variety of top-quality charcoal.
Visit Team Harding today – we’ll help you turn up the heat on flavour!
Follow us on Instagram and Facebook!
Team Harding is Ottawa’s go-to destination for grills, fireplaces, and outdoor heat options. We’re stocked with the brands you know and love.